Windows 11 Insider Edition VM

Windows 10 is the last version of Windows – yeah right. Now here’s Windows 11.

Currently available as preview for Windows Insiders I thought it time to give it a burl as a virtual machine.

First install = Winget. Second = Chrome via Winget. Third = VS Code via Winget. Winget for the Win!

Build & Requirements

  • VMWare Fusion VM running on Mac OS Catalina 10.15.7 on iMac (27-inch, Late 2013) 24 GB RAM
  • Recommend a VM with the following 2 vCPU, 4GB vRAM, 60GB SSD
  • Windows Insider Program Dev Channel – you’ll need a Microsoft account to enable this within Windows 10
  • Windows 10 ISO – download from the Windows Media Creation page
  • You’ll need an activation key as one of the stated requirements is that Windows is activated

Steps

Create a VM

Windows 11 needs a Trusted Platform Module (TPM) chip which at this stage means it will not install on older hardware. I had an existing Windows 10 VM and whilst it is possible to add TPM to an existing machine it is not practical to jump through all the hoops required to get Windows 11 installed. I did manage to get there in the end but the process encrypted the VMX config file and I wasn’t able to address the issue with ethernet detailed below. I also had a legacy BIOS and TPM needs UEFI so a new VM was the only way to go.

Once Windows 10 is installed search for “insider” and you’ll find the option to enable the insider program for Windows. You’ll need to login with a Microsoft account and then select DEV channel which at the time or writing is the only channel for the Windows 11 preview. Down the track if you want a more stable build the other channels will offer Windows 11 preview.

Don’t forget to install VM Tools once Windows is installed.

Windows Update

Windows 11 is delivered via Windows Update. It will take some time to download and upgrade. Keep smashing the update button until it appears.

Ethernet Disabled

I had a weird outcome in that the Windows 11 upgrade process disabled an otherwise working virtual network adaptor. To get the ethernet adaptor enabled first shut down the VM and open the VMX configuration file. Replace the adaptor details in the VMX file with the following …

ethernet0.virtualDEV = "vmxnet3"

Restart the VM and the ethernet adaptor should be enabled and working.
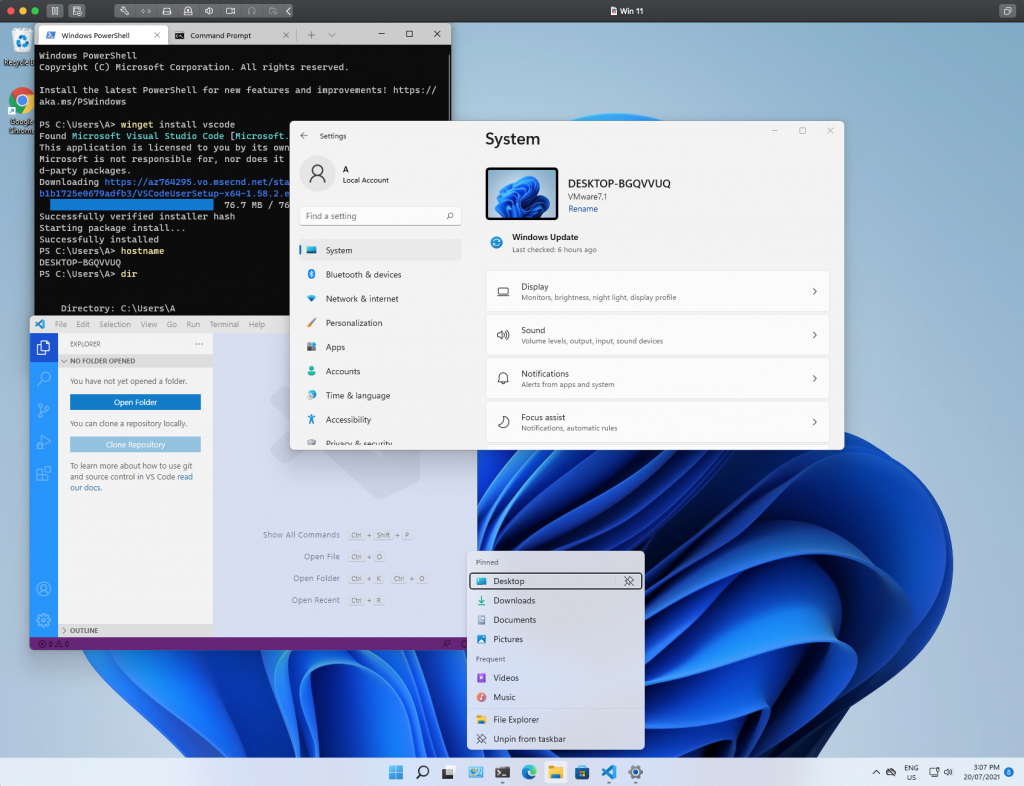
Thoughts

I have to say that after a day of using as a daily driver I really like Windows 11. By far the prettiest Windows has ever looked. If anything Windows 11 addresses the mismatched legacy of visual components that Windows has dragged along with each iteration.

Google Drive Quota

Get a list of all your files and their respective file sizes to determine how your available quota is being used up in Google Drive. Folders are not displayed, only files.

Google Drive file size quota

Remember that GSuite native file formats don’t count towards quota. As of the end of 2021 this is no longer true. What Google giveth they taketh away.

Visit the following URL whilst logged in to Google Drive and file size on disk will be shown for your files.

https://drive.google.com/drive/quota

test

For convenience we’ve written a small tool below that we use internally to generate URL’s to publicly shared items at Google Drive that will generate a direct link to the item for either embedding or downloading.

Step 1 – Copy the Base URL

See animated GIF in this repo /* Needs verbal instructions here as to how to copy the file */ To get the base URL right click on the file and select “Get Link” to obtain the Base URL. Important: You will need to set your sharing permissions first and only get the link available in “Get Link”. The URL generated by the Share… process is not the Base URL you will need for the next step.

Step 2 – Generate the new URL

Paste the Base URL from Step 1 into the text box below and new URL will be generated. You can then copy this use wherever needed.

Paste the Base URL here

You can use this URL generated below for embedding a shared image file.

Your can use this version for sharing a download link.

Here’s another HTML Block

Google Drive Download URL

For convenience we've written a small tool below that we use internally to generate URL's to publicly shared items at Google Drive that will generate a direct link to the item for either embedding or downloading.

Step 1 - Copy the Base URL

See animated GIF in this repo /* Needs verbal instructions here as to how to copy the file */ To get the base URL right click on the file and select "Get Link" to obtain the Base URL. Important: You will need to set your sharing permissions first and only get the link available in "Get Link". The URL generated by the Share... process is not the Base URL you will need for the next step.

Step 2 - Generate the new URL

Paste the Base URL from Step 1 into the text box below and new URL will be generated. You can then copy this use wherever needed.

Paste the Base URL here

You can use this URL generated below for embedding a shared image file.


Your can use this version for sharing a download link.


Killer regex for extracting FILEID [-\w]{25,}$

Windows Terminal

Sooo … got a little excited and decided to give it a go.

The announcement

The repository

Step 1 – Install Windows SDK

Here

You’ll need 3GB. Oh, and you’ll need Visual Studio 2017 as a minimum … and perhaps and hour of waiting.

Once that’s done then I realise additional packages will total another 18GB of “stuff” and my Surface has only 50 GB available after carefully managing the space since I got it.

So … time to hit the pause button and move to a Visual Studio VM in Azure.

In the meantime, here’s the shiny new video

Fuji Xerox Docuprint C2100 printing on Mac OSX

Our Docuprint C2100 is true survivor and is working as well as when it was purchased nearly 10 years ago.

The world has moved on a bit and printing for Mac OSX 10.13 is seemingly not as straight forward as it should be. For the second time in two years I had to troubleshoot getting printing to work so it’s time to document.

The Apple distributed Fuji Xerox driver package yielded errors and the Fuji Xerox package for OSX 10.6 also yielded errors with no print.

Step 1 – Reset Printing System

For me it was to reset the printing system to undo what had been attempted with other drivers. To achieve this right click on the Printers window in Printers & Scanners under System Preferences. Warning – this will remove all configured printers.

Add Printer

Step 2 – Configure Generic PCL Laser Printer

After resetting and removing the drivers add a new Generic PCL Laser Printer. Our printer is on a fixed IP address 172.16.32.9 and the following settings were applied

The duplexer setting appears for selection. The C2100 has duplex printing.

Job jobbed!

The C2100 is a colour printer and colour printing is not available using the generic driver but that is ok for me. I can live with this provided I can duplex print. If you have mixed network of Windows and Mac machines you can print to shared Windows printers provided the Windows machine is running and the C2100 drivers have been setup for shared access.